
Adding Tables in WordPress Posts and Pages with Tablepress
WordPress comes with a visual post editor which is nice, but there are certain things that it can not do. Creating or Adding tables is one of them. Tables are an important tool to sort and present data in an understandable format. Even though you can create tables by manually writing HTML and CSS inside your posts, it is not a feasible option for many specially if they lack the HTML and CSS knowledge. In this article, we will show you how to add tables in WordPress posts and pages. Best of all, you don’t need to know any HTML or CSS to add tables in WordPress using this tutorial.

TABLEPRESS PLUGIN
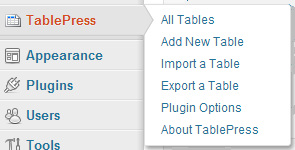
First thing you need to do is install and activate TablePress plugin. Once activated, the plugin adds a TablePress menu item in your WordPress admin.

ADDING TABLES IN WORDPRESS
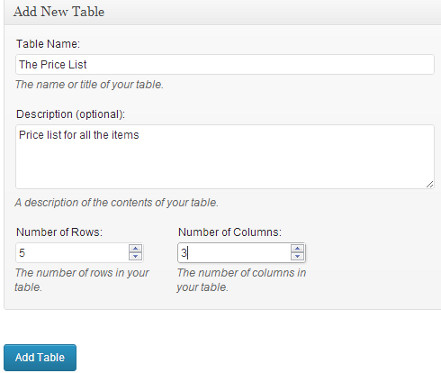
To create a new table click on Add New Table. This will take you to Add New tab. After giving your table a name and description, choose the number of rows and columns you need. Don’t worry, you can always add/remove columns and rows from your table when entering data or by editing the table later. Click Add Tablebutton when you are done.

Now you will reach Edit Table screen. This is the table editor where you can add data to your table. You can also add and remove columns or rows. All rows and columns can be dragged and rearranged. Once you have created the table, it is time to add this table into a post.
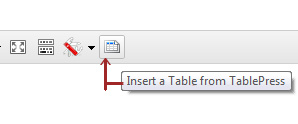
Open an existing post or create a new post to enter the table. If you are using the visual editor, then you will see the tables icon in your visual editor. Pressing the button will open a pop up showing your tables. Press Insert Shortcode button next to the table you want, and it will add a shortcode to your post.

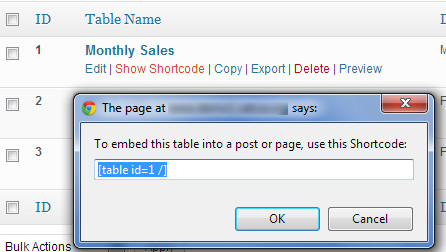
If you do not use the visual editor, then you can simply insert the shortcode manually. Click on the TablePress menu item, and it will show you the list of tables you have created. Take your mouse over to the table you want to add. Click on Show Shortcode, and this will open a pop-up window with the table shortcode. Copy the shortcode and paste it in your post wherever you want to insert the table.

That’s it. It is this easy to create and add tables in your WordPress posts. You don’t have to write a single line of HTML or CSS. If you want to customize the look and feel of the table, then there is an option for that (you would need to customize the CSS for this part).This plugin can also import data from a csv file, json file, an HTML table and json formats. You can also export all your tables in CSV, HTML, and JSON formats. For more usage instructions check out the official TablePress Documentation.
No comments:
Post a Comment